In this article we will explain how to set up your availability in order to ensure that your profile and services are displayed correctly in our Wellbeing Hubs.
To set up your availability and to display your times and dates for clients in Wellbeing Hubs, please follow these steps:
Note: The more availability that you have, the more views and choices you offer to potential clients.
It is recommended to provide availability and flexibility, as this will help drive more potential engagement.
If you are interested in learning more on how to maximise your visibility in our Wellbeing Hubs, please check this article.
Pro Tip: We recorded this "Video Tutorial" below which describes all the steps written in this article.
If you would prefer to read the step-by-step guide, please keep reading below.
Step-by-Step Availability Settings
There are three parts you need to set up. If you have already set up your working hours before, you can keep them as they are.
1. Client Access (For Administrators in the account)
2. Working Hours
3. Wellbeing Hub Availability
Steps to setup your Availability and Working Hours
1. Client Access (Calendar Visibility)
Please note that only Administrators of the Kara Connect Workstation have access to these settings.
- Go to Settings -> Client Access.
- Toggle to “On” the following button “in Client Access:
- Request service from a clinic.

2. Setting up your working hours
1. Go to Settings (in the top-right corner) and click Calendar and schedule.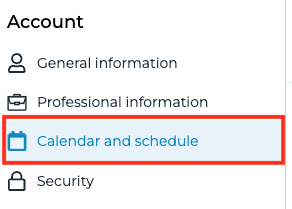
2 (i) Ensure that you have set up the correct Timezone for your account.
Click Edit and find the right timezone in the list. Please note that this is very important!
2 (ii) Go to the Working Hours section and hover over the box and click Edit.

3. Set up your working hours by toggling on the days & times of your working schedule.
Please note: These are your normal working hours - they are not the hours that Wellbeing Hub clients will be able to book your services (which will be explained in the section below) but it's very important that they are set up correctly.

4. Please hover over Booking Configuration and click Edit.

In this section, you can set your Bookable period, Booking notice period, Time buffers and Start time intervals in the same section.
To learn more about these settings (bookable period, notice period, time buffers and start time intervals), please check this article.
Bookable Period: This is the number of weeks your calendar will be open for bookings. This means that clients will be able to book sessions with you for X number of weeks in advance.
For example: If your bookable period is 4 weeks, I will be able to make a booking in your calendar in any open slot between today and the next 4 weeks.
Pro Tip: We recommend having a bookable period of 4-6 weeks as this will open availability for potential clients and give your profile more exposure.
Notice Period: Notice period is the minimum amount of time that a professional needs between the moment when the booking is made and the session happens.
For example: If your notice period is 24 hours and right now it is 3pm on Thursday 25th May, then the earliest booking time that is visible on the Wellbeing Hub is 3pm on Friday 26th May (provided that the slot is free and available).
Pro Tip: We recommend having a Notice Period of 24 hours, as this will enable clients to find a suitable time for them in your calendar to book a session. This will also help to drive exposure of your profile and more potential bookings.
Time Buffer after a session: This sets the amount of time after your previous session that clients will see the next available time.
For example: If you have a meeting that lasts an hour, you may not want to be booked for the next hour immediately.
Now, clients will only be able to book the next session 15 minutes after your previous one. (Depending on your configuration)
Pro Tip: Consider keeping the time buffer after a session at 0 minutes if it aligns with your schedule.
This setting allows clients more flexibility to book your calendar, increasing their chances of finding a suitable time slot.
Start Intervals: This defines how often appointments should start, allowing clients to book within a specific time range.
Currently, clients can see your calendar and book every 15 minutes. If you have your calendar open in Wellbeing Hubs, users can book you at 15-minute intervals, such as 9:00am, 9:15am, 9:30am, 9:45am, 10:00am, etc.
You also have the option to choose what intervals to show your clients.
For example: You can choose to only show 30-minute intervals. This means that, if you set this up, your clients will be able to book your services at 30-minute intervals: 9:00am, 9:30am, 10:00am, 10:30am, etc.
If you have a session at any of those times, users won't be able to book a slot in that schedule.
Pro Tip: Consider keeping the time interval to 15 minutes as pre-set. This setting allows clients more flexibility to book your calendar, increasing their chances of finding a suitable time slot

5. Click Save settings to save your settings.
3. Setting up your Wellbeing Hub Availability and Schedules
- Please click Settings -> Calendar and Schedule.
- Under Wellbeing hub availability, click Add new+.
Please note: If you can't see the section Wellbeing hub availability, this means that your profile has NOT been connected yet to a Wellbeing Hub.
In this case, please wait for your Customer Success Manager to connect your profile or contact us at support@karaconnect.com

2.1 If you see under Wellbeing Hub Availability something like the image below, this means that you have been connected to a Wellbeing hub.
- Our recommendation is to click Edit and add the Wellbeing Hub to which you have been connected in the Visible on selected Wellbeing Hubs field (as per the GIF below).

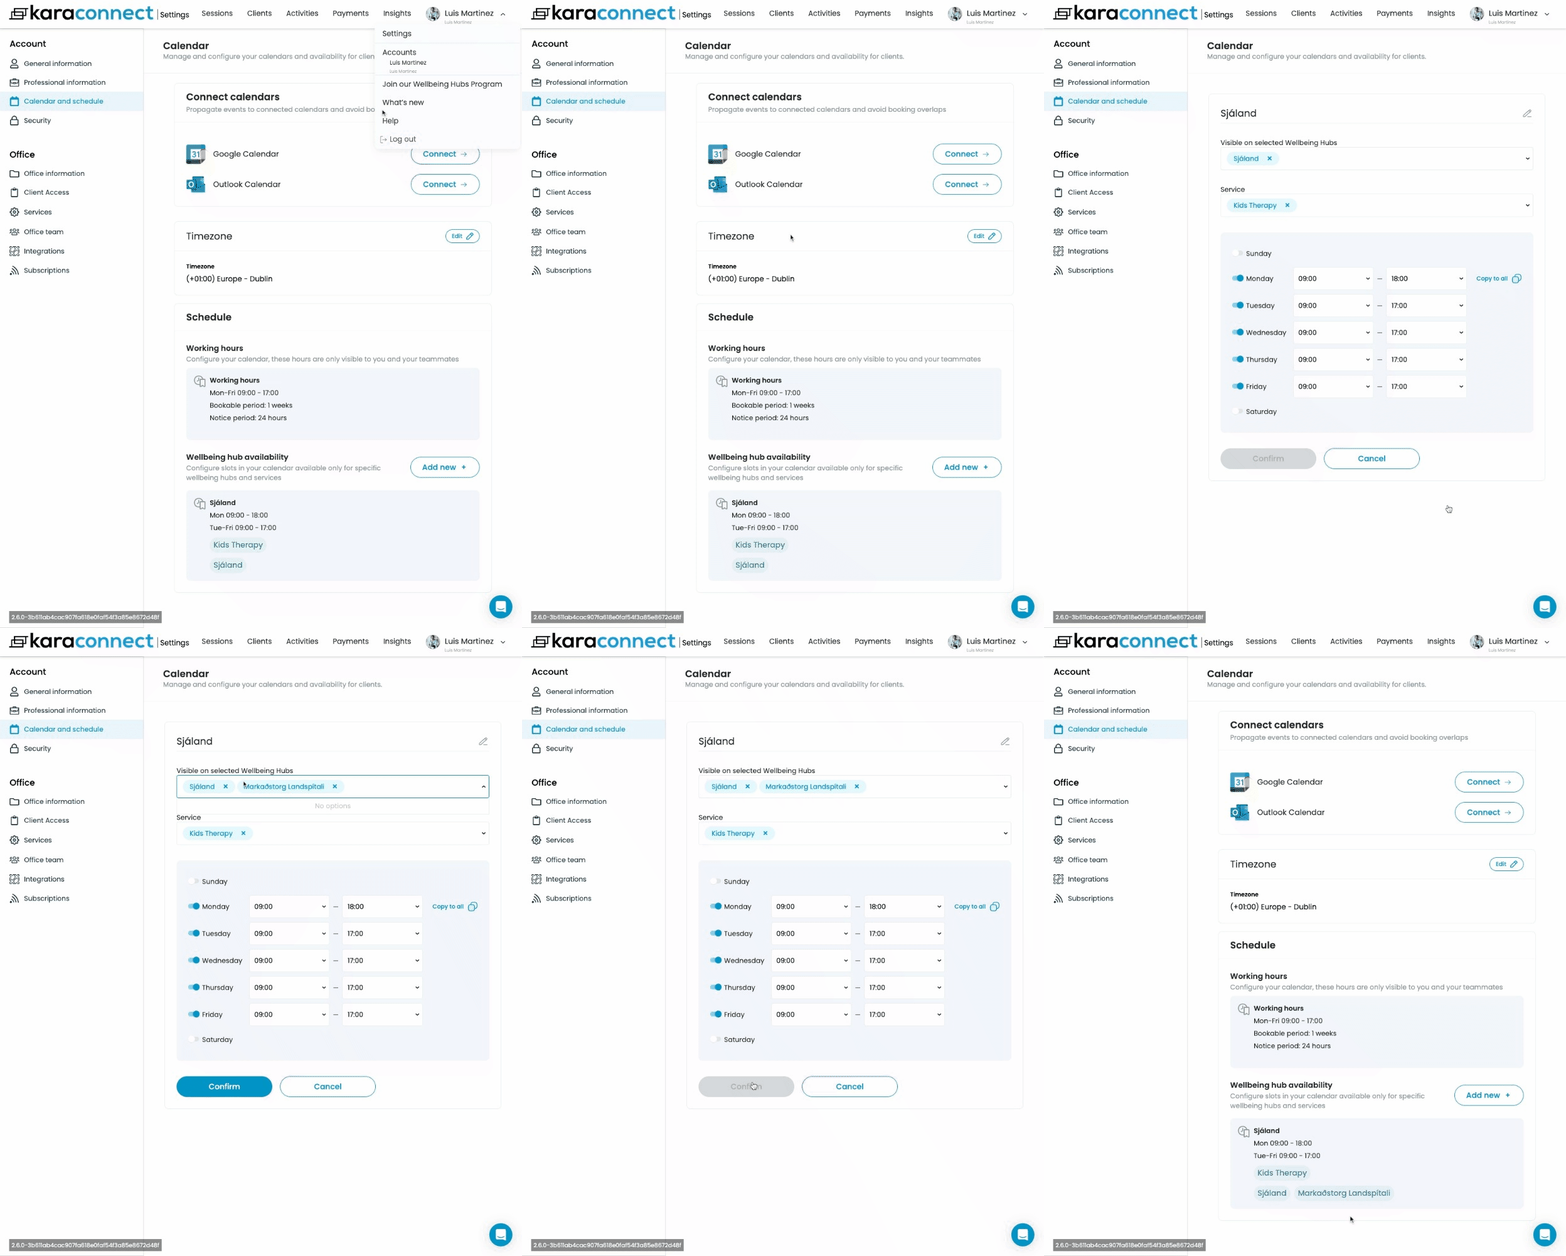
Setting up your Wellbeing Hub availability
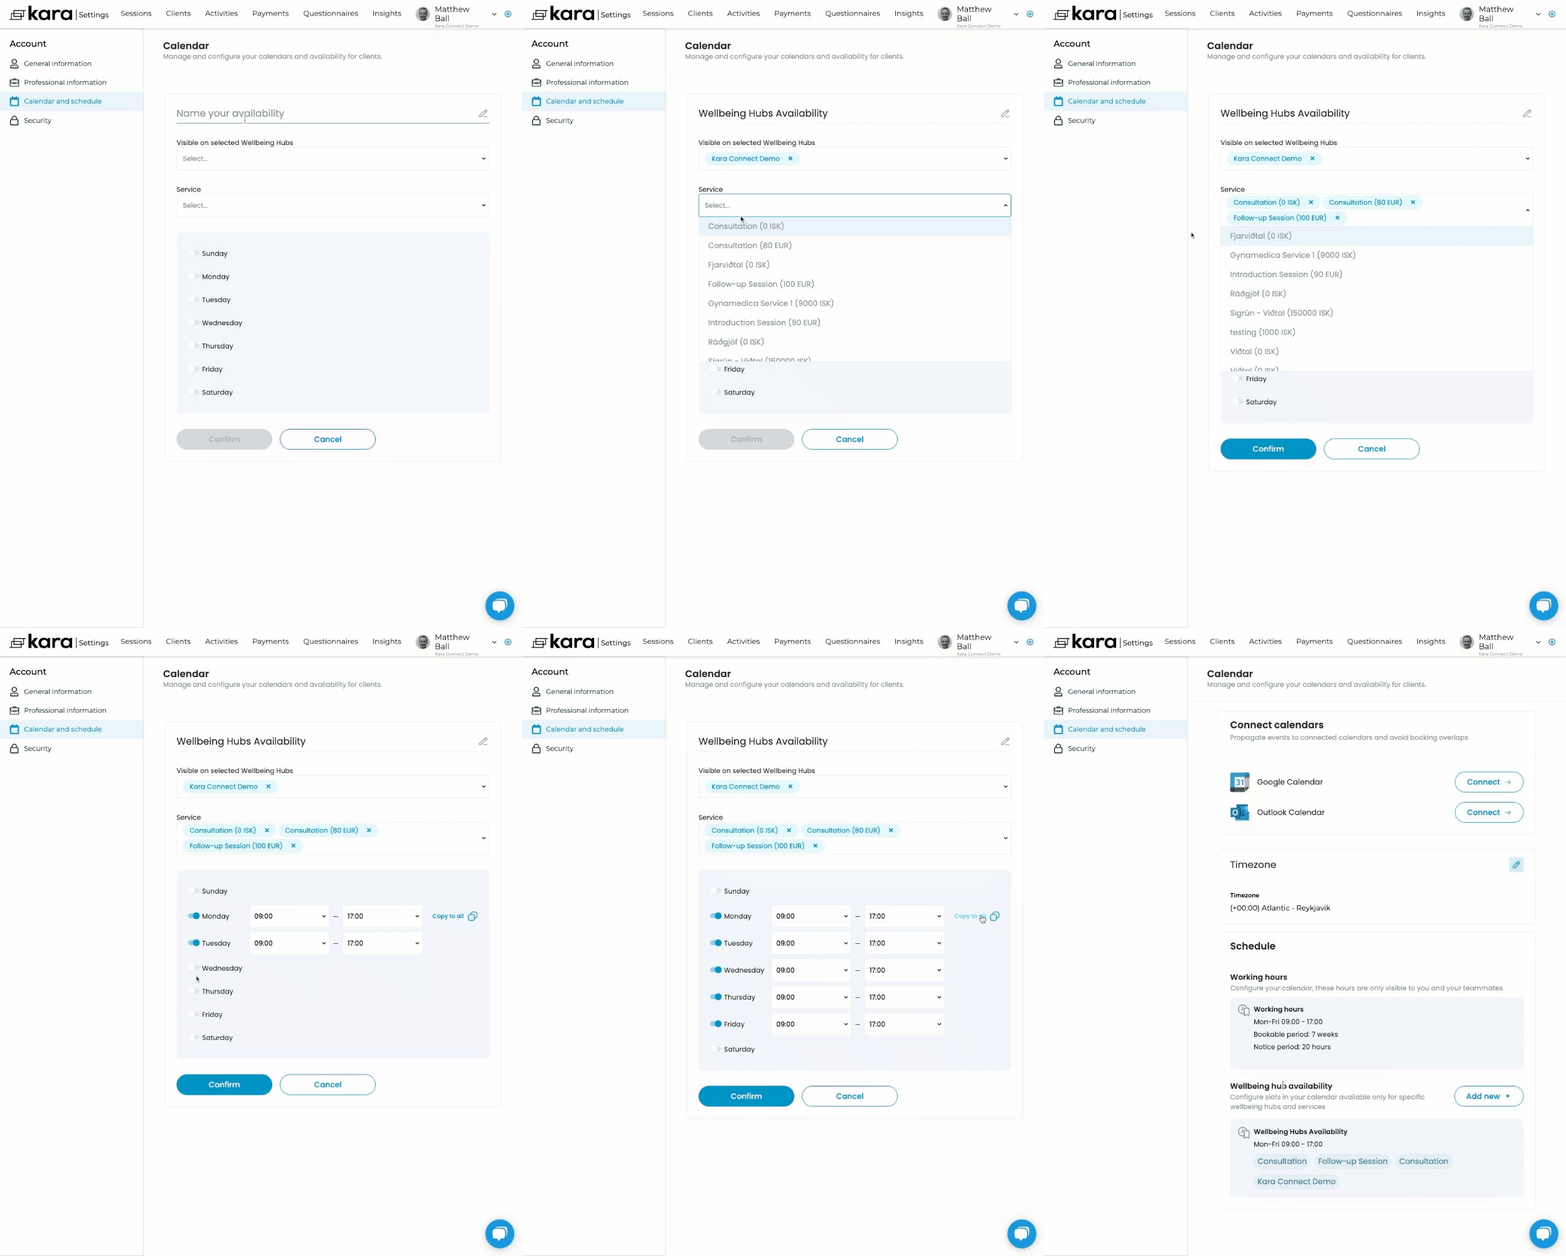
In either case (Creating a New Schedule or Adding to the Existing Schedule), now you can either edit or set up your Wellbeing Hub availability.
- Set up your Availability Name: This is the name of your custom schedule as there may be instances that you are connected to multiple wellbeing hubs and you are able to set up different availability times and days across different Hubs.
Pro tip: Keep the name generic, such as My Wellbeing Hub Availability in case you want to use the same availability across multiple Wellbeing Hubs - which is recommended.
This name is only for you; clients can't see it.
- Select the Wellbeing Hubs that will show that specific availability.
Caution: If you remove a wellbeing hub from the selected list, your profile will be moved to On Request, provided that under Client Access, the Request service from a clinic setting is toggled to on. This may cause a drop in visibility and bookings.
If this toggle is not switched to on, your profile will show as No availability (Please refer to section 1 of this article).
- Select the Service that you will be displaying for the Wellbeing Hub. To learn more about Services or how to set up a Service, please see here.
Pro Tip: You can select one service or multiple services for clients to choose from - we would generally advise to not have more than 3 services in your Wellbeing Hub availability in order to make it easier for potential clients to make a booking with you.
Please note that if you don't see any services, this means that you haven't configured them yet. To do this, you can simply follow these steps.
- Finally, select the times and dates that you will have open availability and Click Confirm.
Pro Tip: The more days and times for which you open your calendar, the higher the chances you have of receiving client bookings.
We recommend having a full open schedule to provide clients choice.
Please note that clients won't be able to book you outside your predefined working hours or at a time slot that has already been taken.
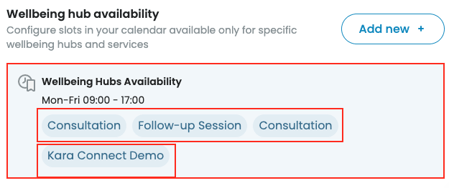
- Once you have successfully setup your Wellbeing Hub availability, you will see your availability display and the services that are connected to that availability as shown below.
Pro tip: If you are connected to multiple Wellbeing Hubs, we recommend having only one Wellbeing Hub availability set up and ensuring that all of the Wellbeing Hubs to which you are connected are included in the Visible on selected Wellbeing Hubs field.
If you see an existing schedule, then you can click Edit and click on the Wellbeing Hubs that appear in the Visible on selected Wellbeing Hubs field.
-gif.gif?width=688&height=389&name=chrome-capture-2024-6-19%20(1)-gif.gif)
Creating Multiple Wellbeing Hub Availabilities
If you are invited to multiple Wellbeing Hubs, you can set up the same availability across multiple hubs (which we generally recommend - as per the GIF above), or to create new availability.
To create new availabilities, you can follow these steps.
Recommendation: Client Registration Requirements
Before your clients book sessions with you, there may be certain additional pieces of information that you would like to have from them in advance of the session taking place.
This is called Client Registration Requirements. When a Client is booking a session with you, they will be prompted to add some additional information before processing the booking.
Please note: Anything you add to the booking flow will impact or create additional friction for the Client when booking a session with you, so we recommend using only what you really need to run your session.
To learn more about this feature or check out how to set this up, please go here.
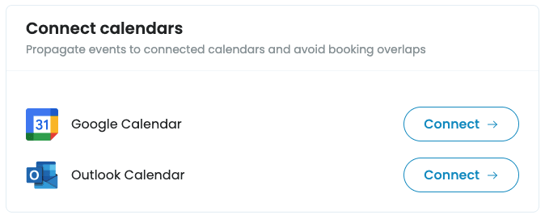
Recommendation: Connect your Kara Connect calendar to Google or Outlook calendar.
You can connect your Kara Connect calendar to an external calendar.
Select which option applies by clicking on either Connect to Google Calendar or Connect to Outlook Calendar.
Please note: Currently the calendar sync is manually triggered when accessing your Kara Connect workstation.
For more information about calendar sync, please click here.
Pro Tip: To learn about all the settings to set up the perfect profile on Wellbeing Hubs, please go here.
